
If you’re deep into your home lab journey with several self-hosted apps, you know that remembering all the URLs to access each service’s management pages soon becomes a nightmare. Plus, if anything changes in the configuration of your home network, you have to go in and change everything manually. Instead, you can set up a reverse proxy to direct traffic to your self-hosted apps so they’re all reachable from the same external URL.
Basically, the reverse proxy is another server on your home network that sits between the internet-at-large and your self-hosted apps and other servers. That makes it another layer of security, as incoming client requests only know about the server the reverse proxy is installed on. It also makes administration easier because once you’ve set up your internal networking rules, the only place you need to change them is on your custom DNS server.
You might think a reverse proxy is tricky to set up, but modern services do most of the work for you. I’ll discuss one method, using a Synology NAS, and explain how the process works in more general terms if you want to use a different reverse proxy server.
Related
9 reverse proxies you should check out for your home network
If you’re self-hosting any services, you’ll want a reverse proxy as another layer of defense.
What you’ll need
We’re using a Synology NAS here, but the process is similar for all reverse proxies
You don’t need many things to get a reverse proxy running on your Synology NAS for your self-hosted apps. We do need a list of services we’re going to put behind the reverse proxy, and a Synology NAS that’s running the latest version of DSM.
Also, we’ll need:
- An SSL certificate (this is for security purposes, and you can get your own inside DSM for free from Let’s Encrypt)
- A domain name (eg: yourdomainname.com) so you can have subdomains for each webapp you want to use with the reverse proxy
- Port 443 is forwarded from your router to your NAS local IP address
- The IP address and port number for each self-hosted app
Related
How to set up Bitwarden and keep your passwords safe on a Synology NAS
Store and manage all your passwords on your Synology NAS.
Setting up a reverse proxy on a Synology NAS
Let’s get our Docker containers all in a row
Currently, the only self-hosted service I have running on my Synology is Home Assistant. That’s partly because it’s awesome, and I wanted a way to control my smart home from one dashboard, but it’s the only service because I had a mishap not long ago and had to redo my entire NAS setup. Painful lessons were learned, and I’ve started afresh with new security and backup policies and two-drive redundancy in my RAID array.
Normally, I connect to HA using its local IP address and port combination, but that’s annoying for several reasons. First, my Synology IP address might change depending on how I set up my home lab, and I hate having to remember strings of IP addresses and port numbers. I also don’t like the idea of exposing so many ports to the wider internet.
So, let’s get started by getting DDNS set up so we have a domain name to point at and a wildcard SSL certification so we can use subdomains.
We want the wildcard SSL certificate for security, but also because it will cover any subdomains we use. Our web apps will be set up in the form of yourwebappname1.domainname.com, yourwebappname2.domainname.com, etc.
First, we’re going to set up DDNS and our SSL certificate:
- Log in to your Synology NAS.
-
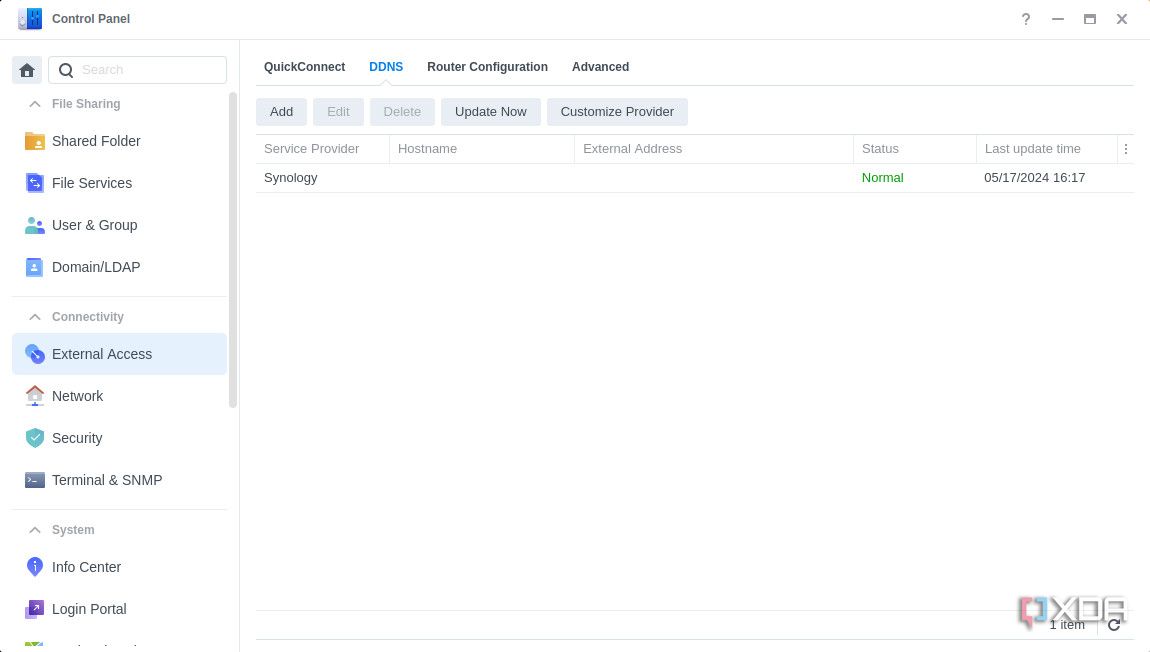
Open the Control Panel, go to External Access > DDNS, and select Add.
-
Fill the form up as follows: Service Provider: Synology, Hostname: mydomainname (eg: xda.synology.me), and click on Test Connection.
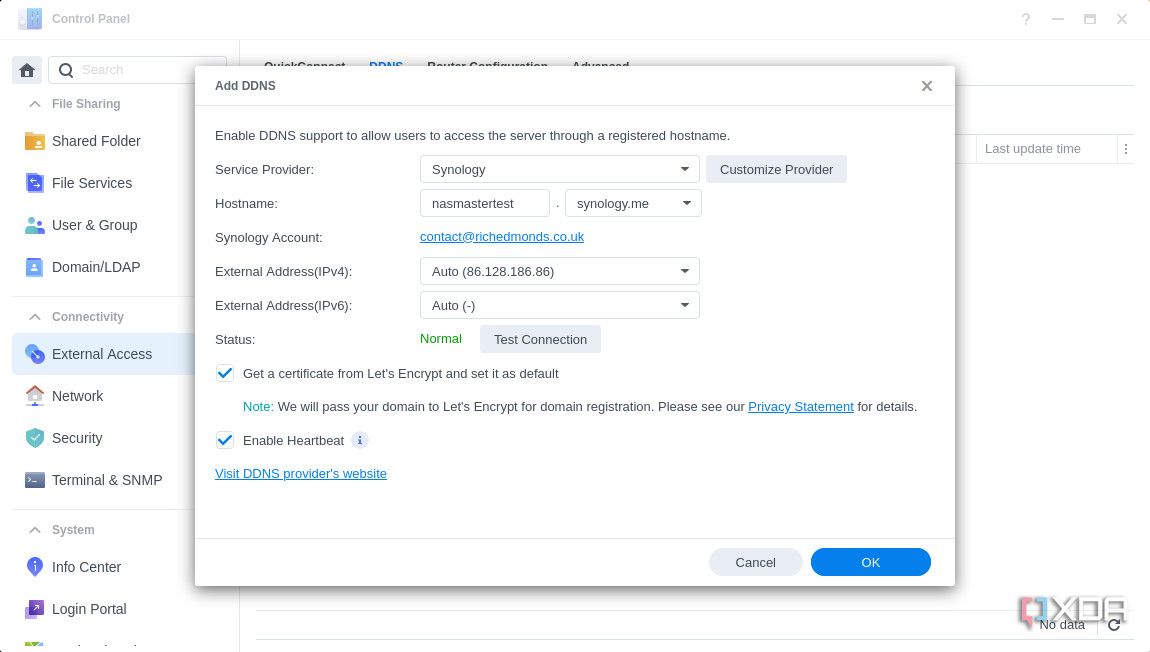
- If it fails, that hostname is already taken, and you’ll have to try a few different versions until you find one that isn’t.
- Also, before moving on, fill in the checkbox next to Get a certificate from Let’s Encrypt and set it as default.
- Click on OK.
-
Navigate to Security > Certificate and select Add.

- Select Replace an existing certificate and select the one that we just created before clicking on Next.
- Select Get a certificate from Let’s Encrypt and fill the checkbox next to Set as default certificate.
- Select Next.
-
Fill in the Hostname: mydomainname.com, your email address: your@email.com, and don’t forget to put the wildcard in the box with *.mydomainname.synology.me.
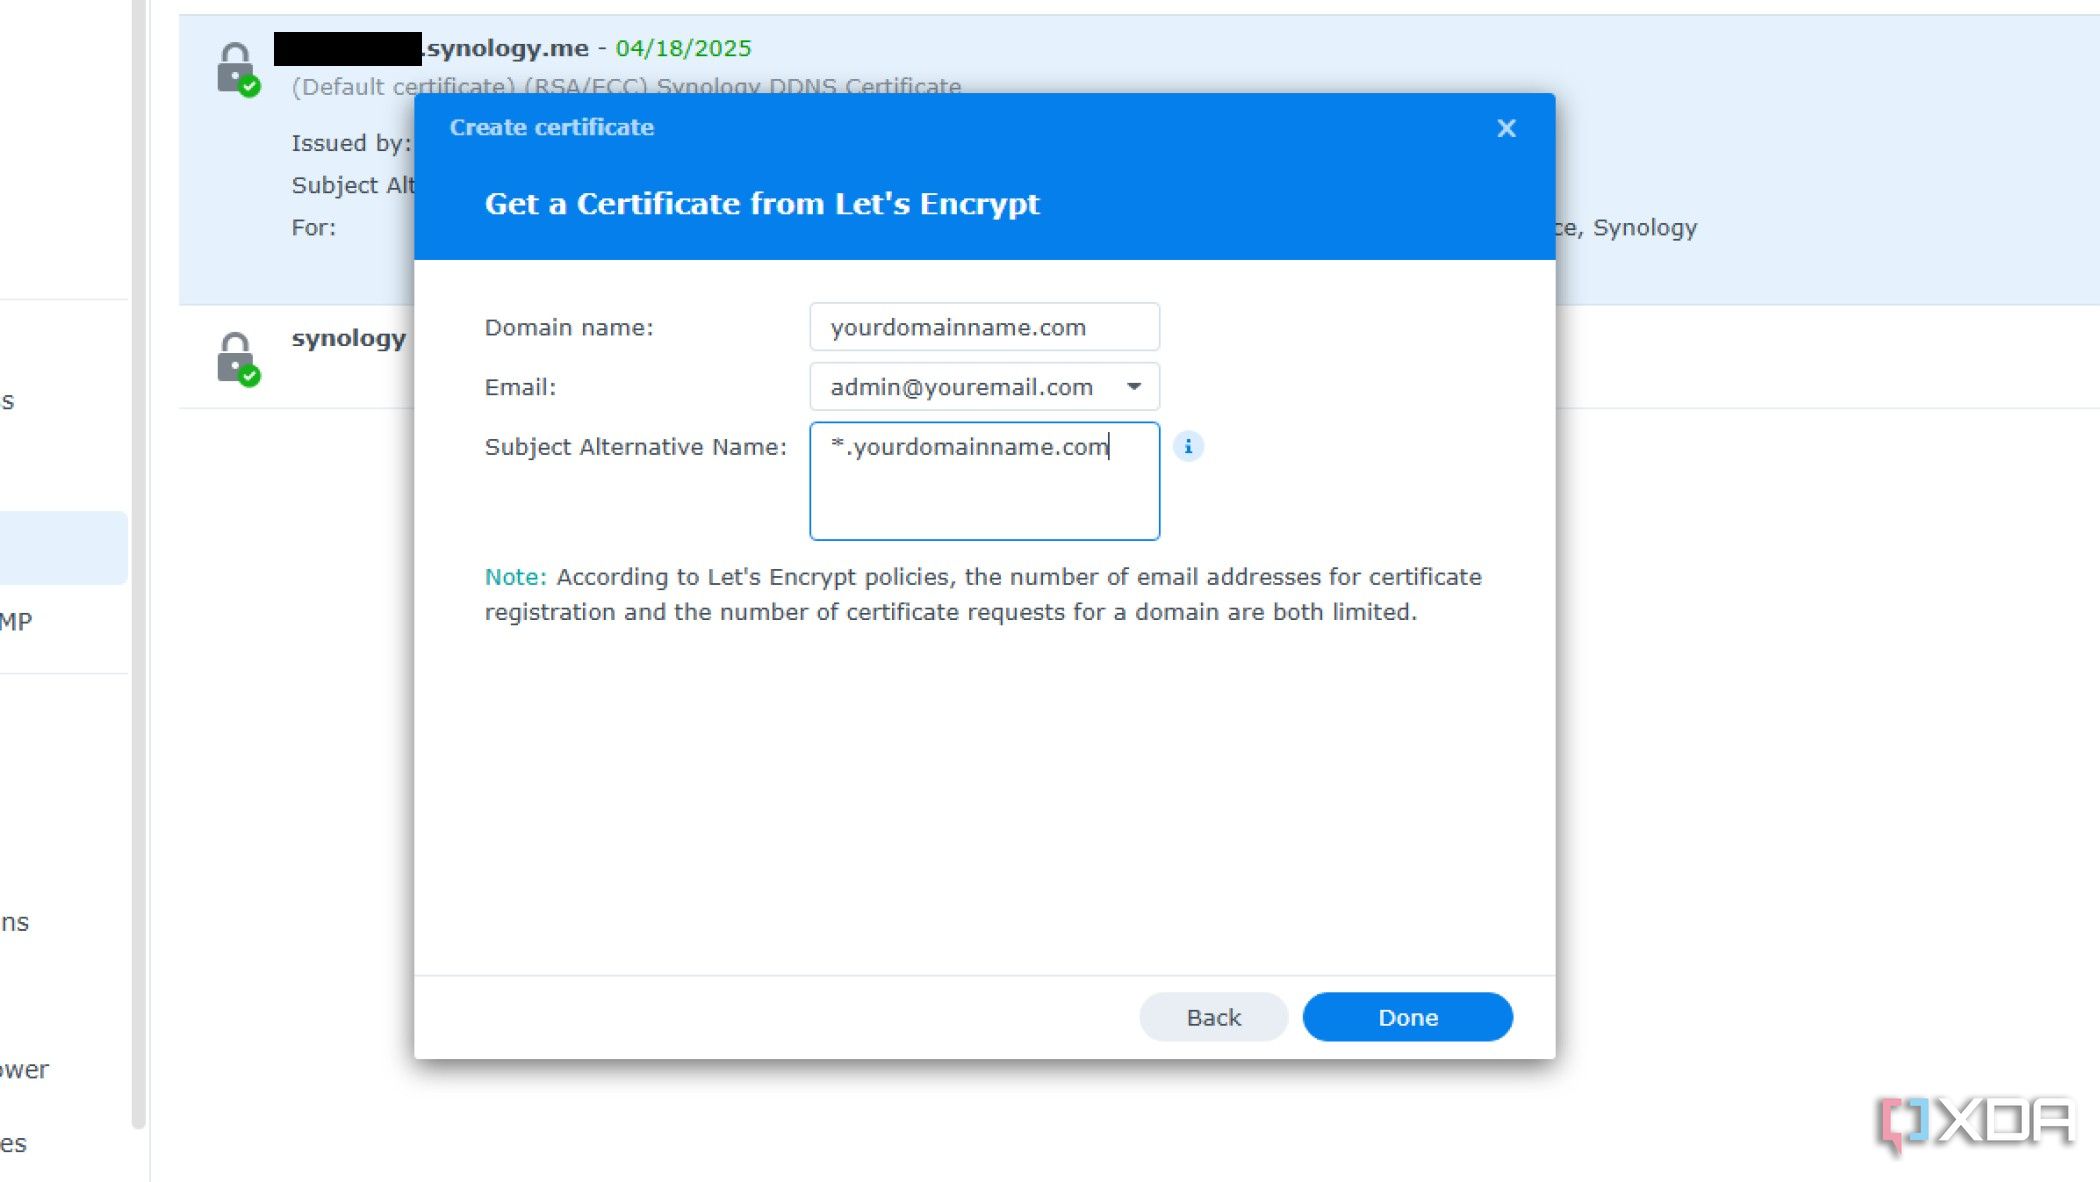
- The wildcard SSL certificate allows us to use subdomains from the same certificate without generating new certificates. This is important, so click Next when you finish to save the SSL certificate.
Time to set up our reverse proxy
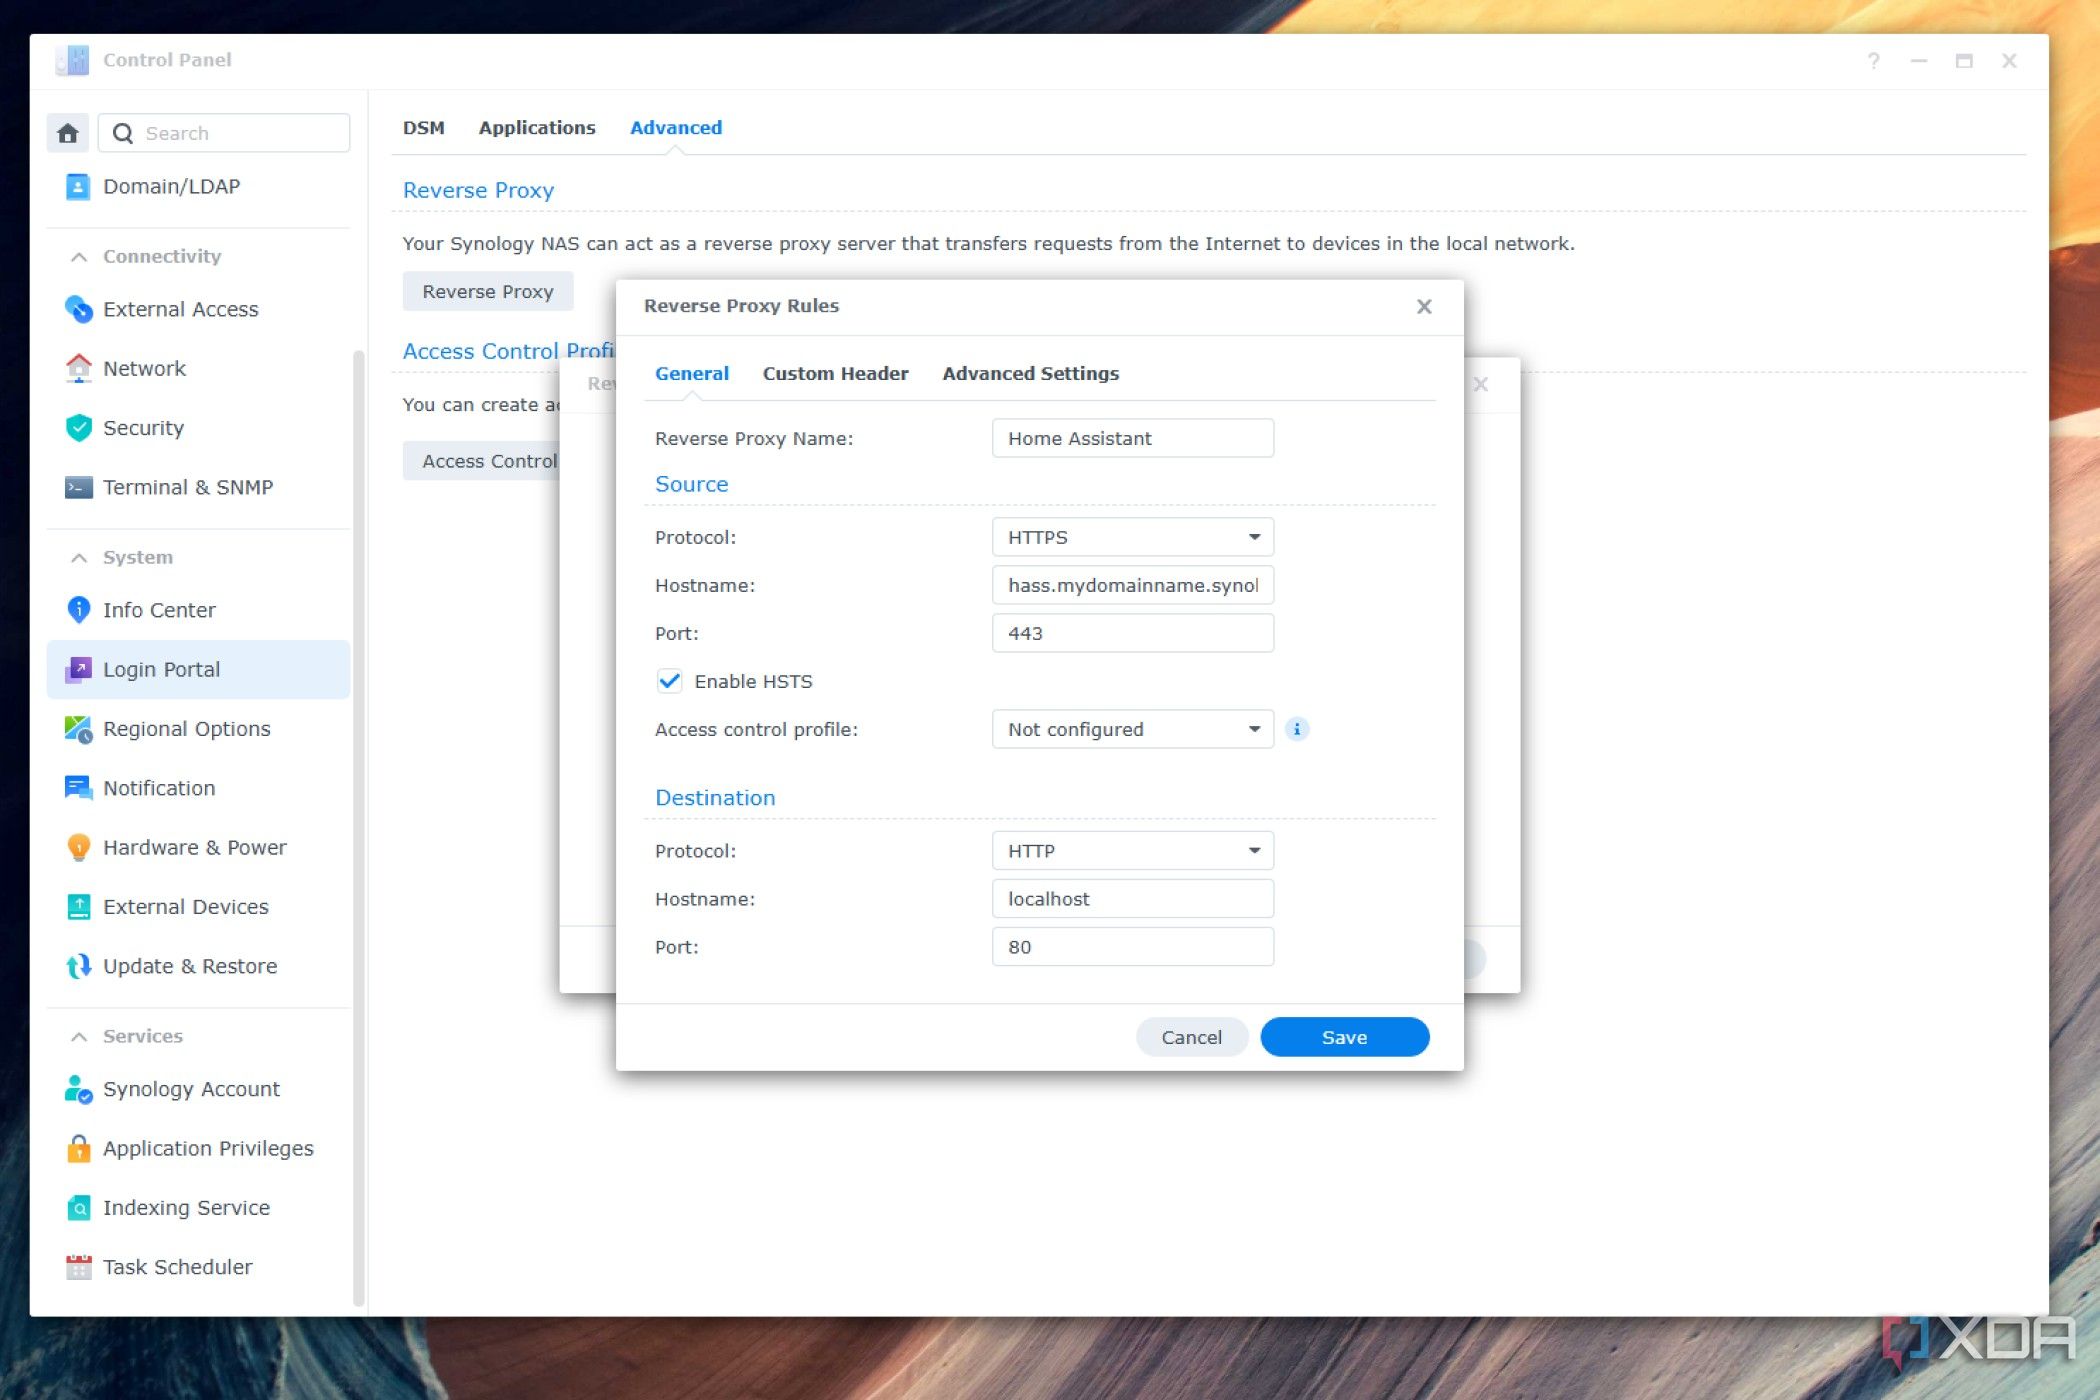
Now, it’s time to set up our reverse proxy for our first self-hosted app. If you have more than one app, repeat this part of the process, changing the subdomain each time so it represents the web app you want it pointing at.
- We’re still working on the Control Panel on the Synology.
- Go to Login Portal > Advanced.
- Click Reverse Proxy.
- Click Create.
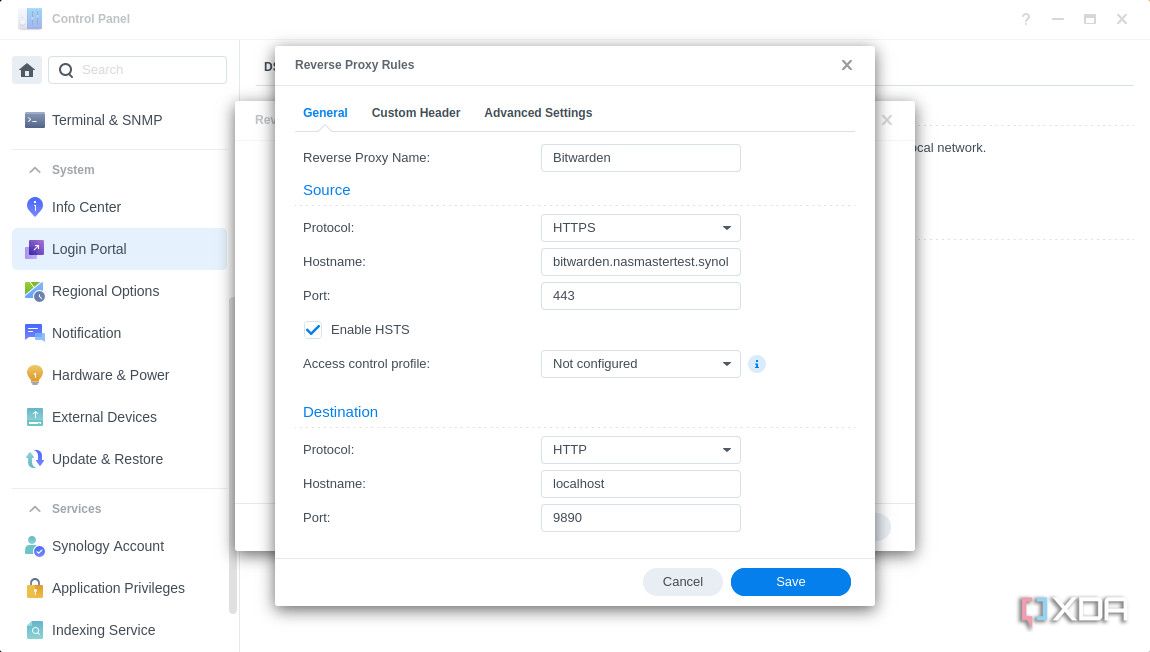
- Set a Proxy name, change the source protocol to HTTPS, enter your subdomain hostname (eg: hass.mydomainname.synology.me), set the source port to 443, Enable HSTS, set the destination hostname to either localhost or the IP address of your web app and the destination port to the port your web app needs.
-
Select the Custom Header tab.
- Click Create.
- Select WebSocket.
- Click Save.
- Click Close.
- Go to Network > Connectivity and Enable HTTP/2, then click Apply.
- Then go to Security > Advanced, enable HTTP Compression, and click Apply.
-
Then go to Security > Certificate, click on Settings, and select your SSL certificate from the dropdown menu next to the hass.mydomainname.synology.me entry
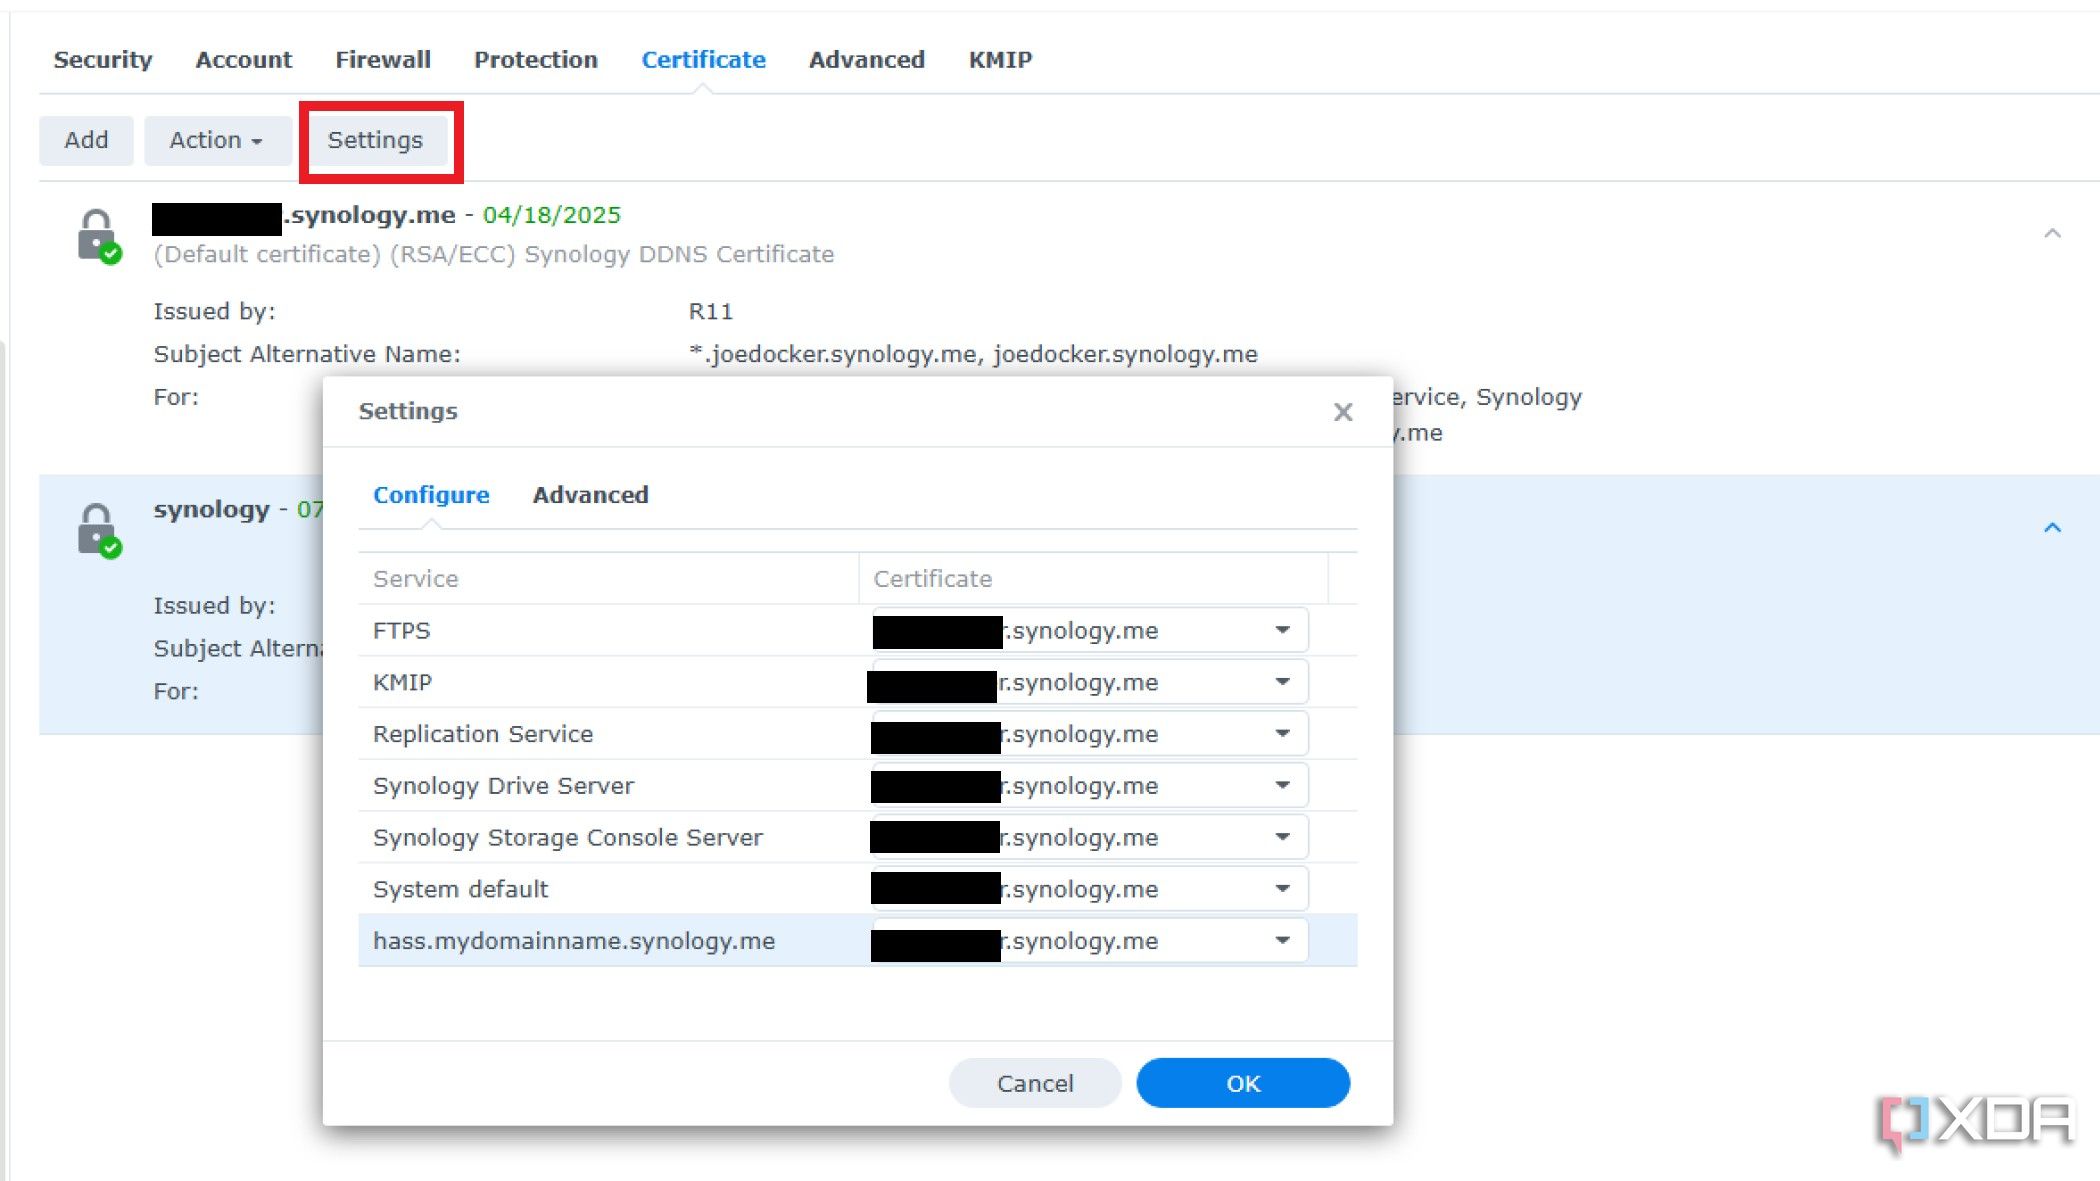
Now, your reverse proxy is set up to access your Home Assistant instance from inside and outside your home network by using hass.mydomainname.synology.me.
Related
How to migrate from one Synology NAS to another
Moving from an old Synology NAS to a new one is SO easy.
Using a reverse proxy makes organizing your self-hosted services easier
Setting up a reverse proxy makes it easy to get to your self-hosted Vaultwarden instance easier, or your Home Assistant to control your smart home. It also makes your home network safer overall, as you’re only exposing one port to the wider internet for all your self-hosted apps. But that doesn’t mean you can slack off with security, and you still need to be careful to ensure you’ve linked your SSL certificates properly.

