I used a combination of Apple iCloud and Microsoft One Drive to back up and catalog photos and videos. This setup was perfect when sailing through my twenties, but now that home labs are fully taking off and apps are much more refined, I turned to Immich and have not looked back once. I’ll run you through why you’d want to make the switch with me, what Immich is, and how to quickly set up and deploy your own photo and video hosting platform.
The issue with paying for photo storage
Cloud-based storage is fantastic for conveniently storing data that can be backed up and downloaded on other devices. The issue arises when paying for this service over time. The longer you have the hosting plan, the more money you’ve handed to the big tech giants. These plans often offer considerably less storage capacity than what’s available with storage drives. Using a single 20TB mechanical hard drive inside a NAS will provide more space for all your photos and videos than what Google, Microsoft, and many others offer without heading into enterprise-grade storage solutions.
It’s not all good news for self-hosted photo management, however. Doing so requires you to learn a few things, particularly about networking, server management, and Docker containers, and you’ll be tasked with all tech support requests should you hand out access to friends and family. But if you don’t mind all that, deploying your own Immich server can be a lot of fun! I’ve been slowly transforming various parts of my “smart home”. The Ring alarm and surveillance system has been integrated with Home Assistant, and so has the Philips Hue bridge and all other connected devices.
Jellyfin is hosting all our purchased movies, shows, and music tracks. We’re saving a considerable sum of money each month on subscription cost-cutting. Although we do fork out slightly more for purchasing media we wish to consume, we’re then able to store everything on local hardware and enjoy without having to rely on streaming services to maintain availability. It also only seems as though more content is being locked behind additional paywalls, especially on Amazon Prime Video, so are we really spending much more?
Related
5 reasons Immich is better than Google Photos and iCloud
Compelling reasons to retain your privacy and self-host your photos and videos with Immich
What is Immich?
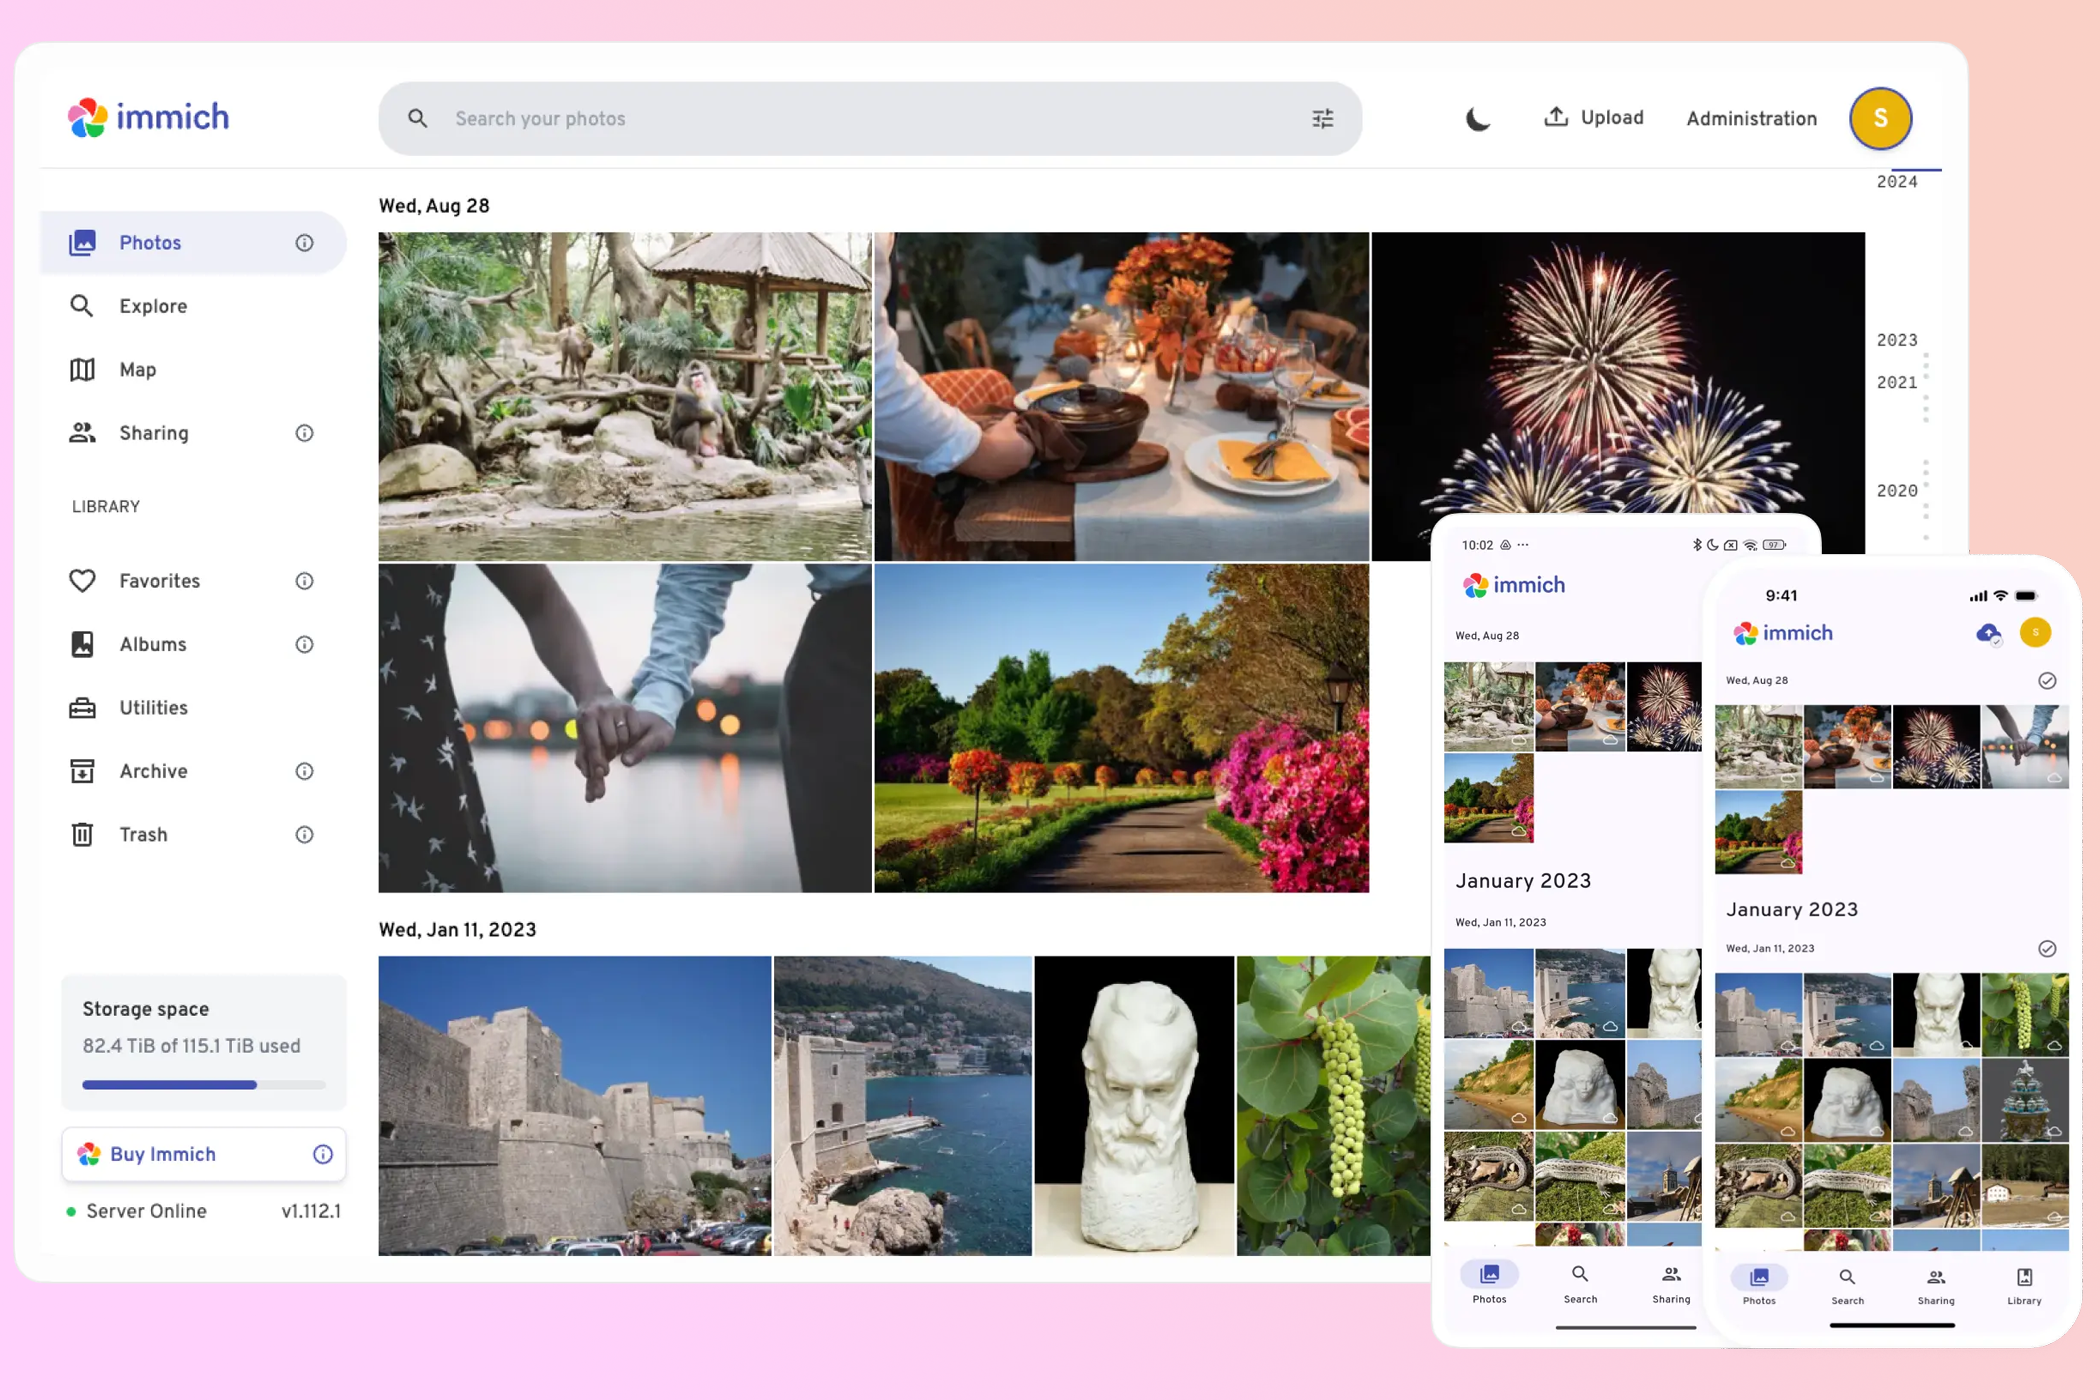
Immich is very much like Google Photos, iCloud, Dropbox, and Microsoft OneDrive in that it allows one to store photos in the cloud, the only difference being this cloud is owned and managed locally. Instead of relying on a company to host all your data, you can take full control over everything and save money in the long run as this software is completely free to use and can be installed on almost anything. If you already have network-attached storage (NAS) ready to go, you’re already halfway there. If not, you’ll need a device to store everything on. I recommend building your own compact NAS.
If you’ve used Google Photos or OneDrive to store media, you’ll feel right at home with Immich. The UI and how everything is laid out are similar in more ways than not. But don’t think this software can’t be as powerful as some of those cloud storage subscriptions you’ve paid for in the past. After installing Immich, you can make use of its AI-powered recognition for faces and people, multi-platform support, automated photo and video backups, geotagging, and more. I find Immich much better to use with all the must-have features available without all the unnecessary overhead.
How to set up your Immich photo hosting platform
The easiest way to install Immich is through Docker on a NAS or SBC connected to the home network. So long as your internal storage is large enough to accommodate all your media, you can configure all your devices to automatically back everything up to Immich. Here’s how to install the Immich container, which should be similar across multiple platforms and operating systems.
-
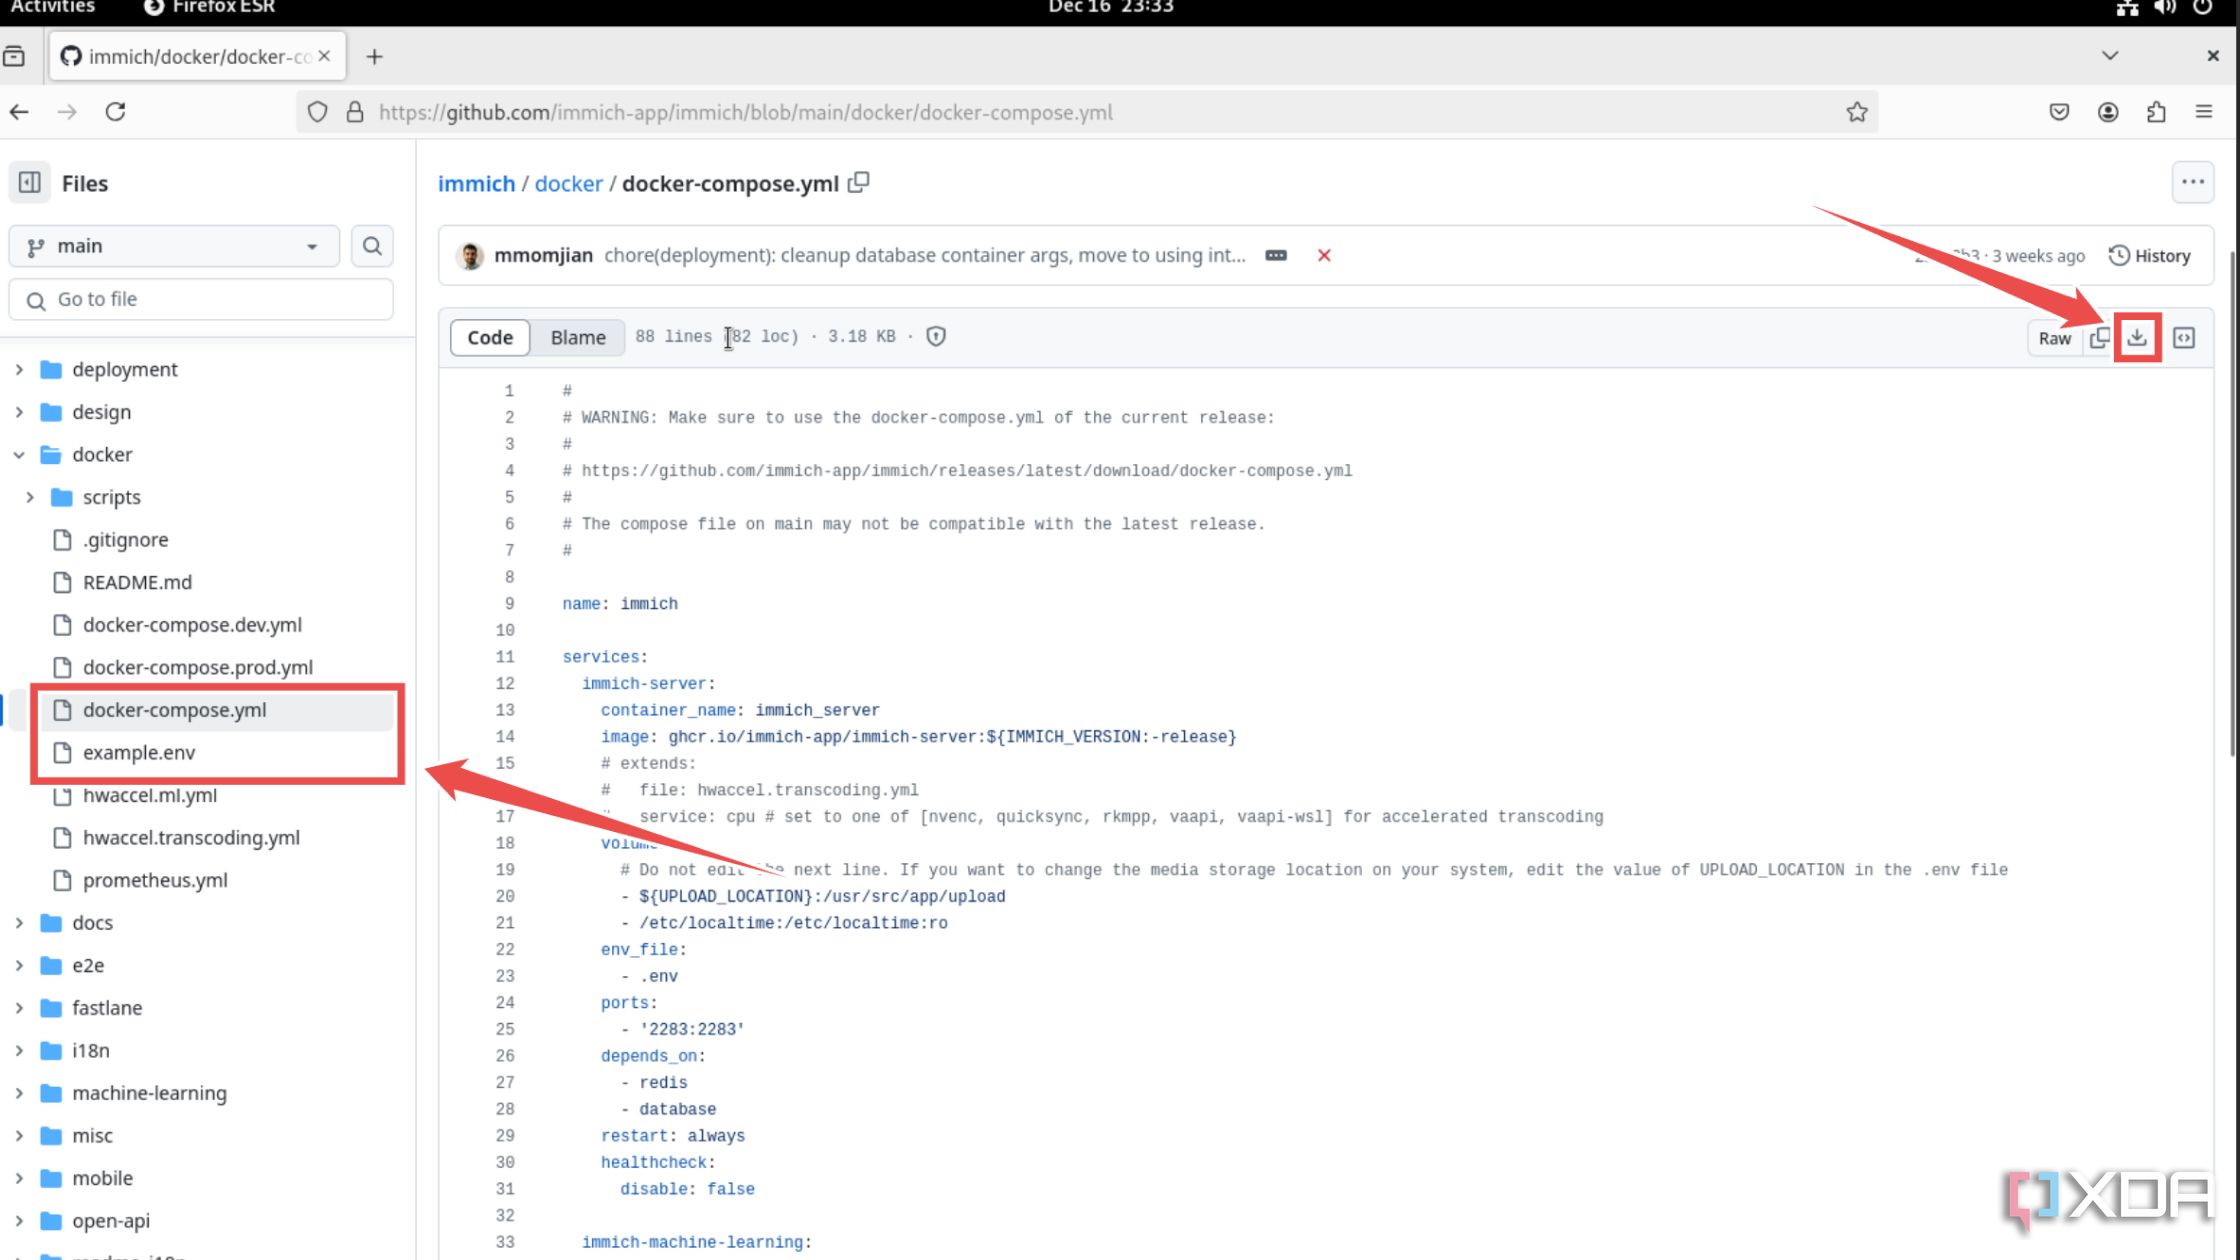
Head to the Immich GitHub link and download the example.env and docker-compose.yml files.
If you’re on a CLI distro, you can download them by executing the wget command followed by their URLs inside the terminal.
-
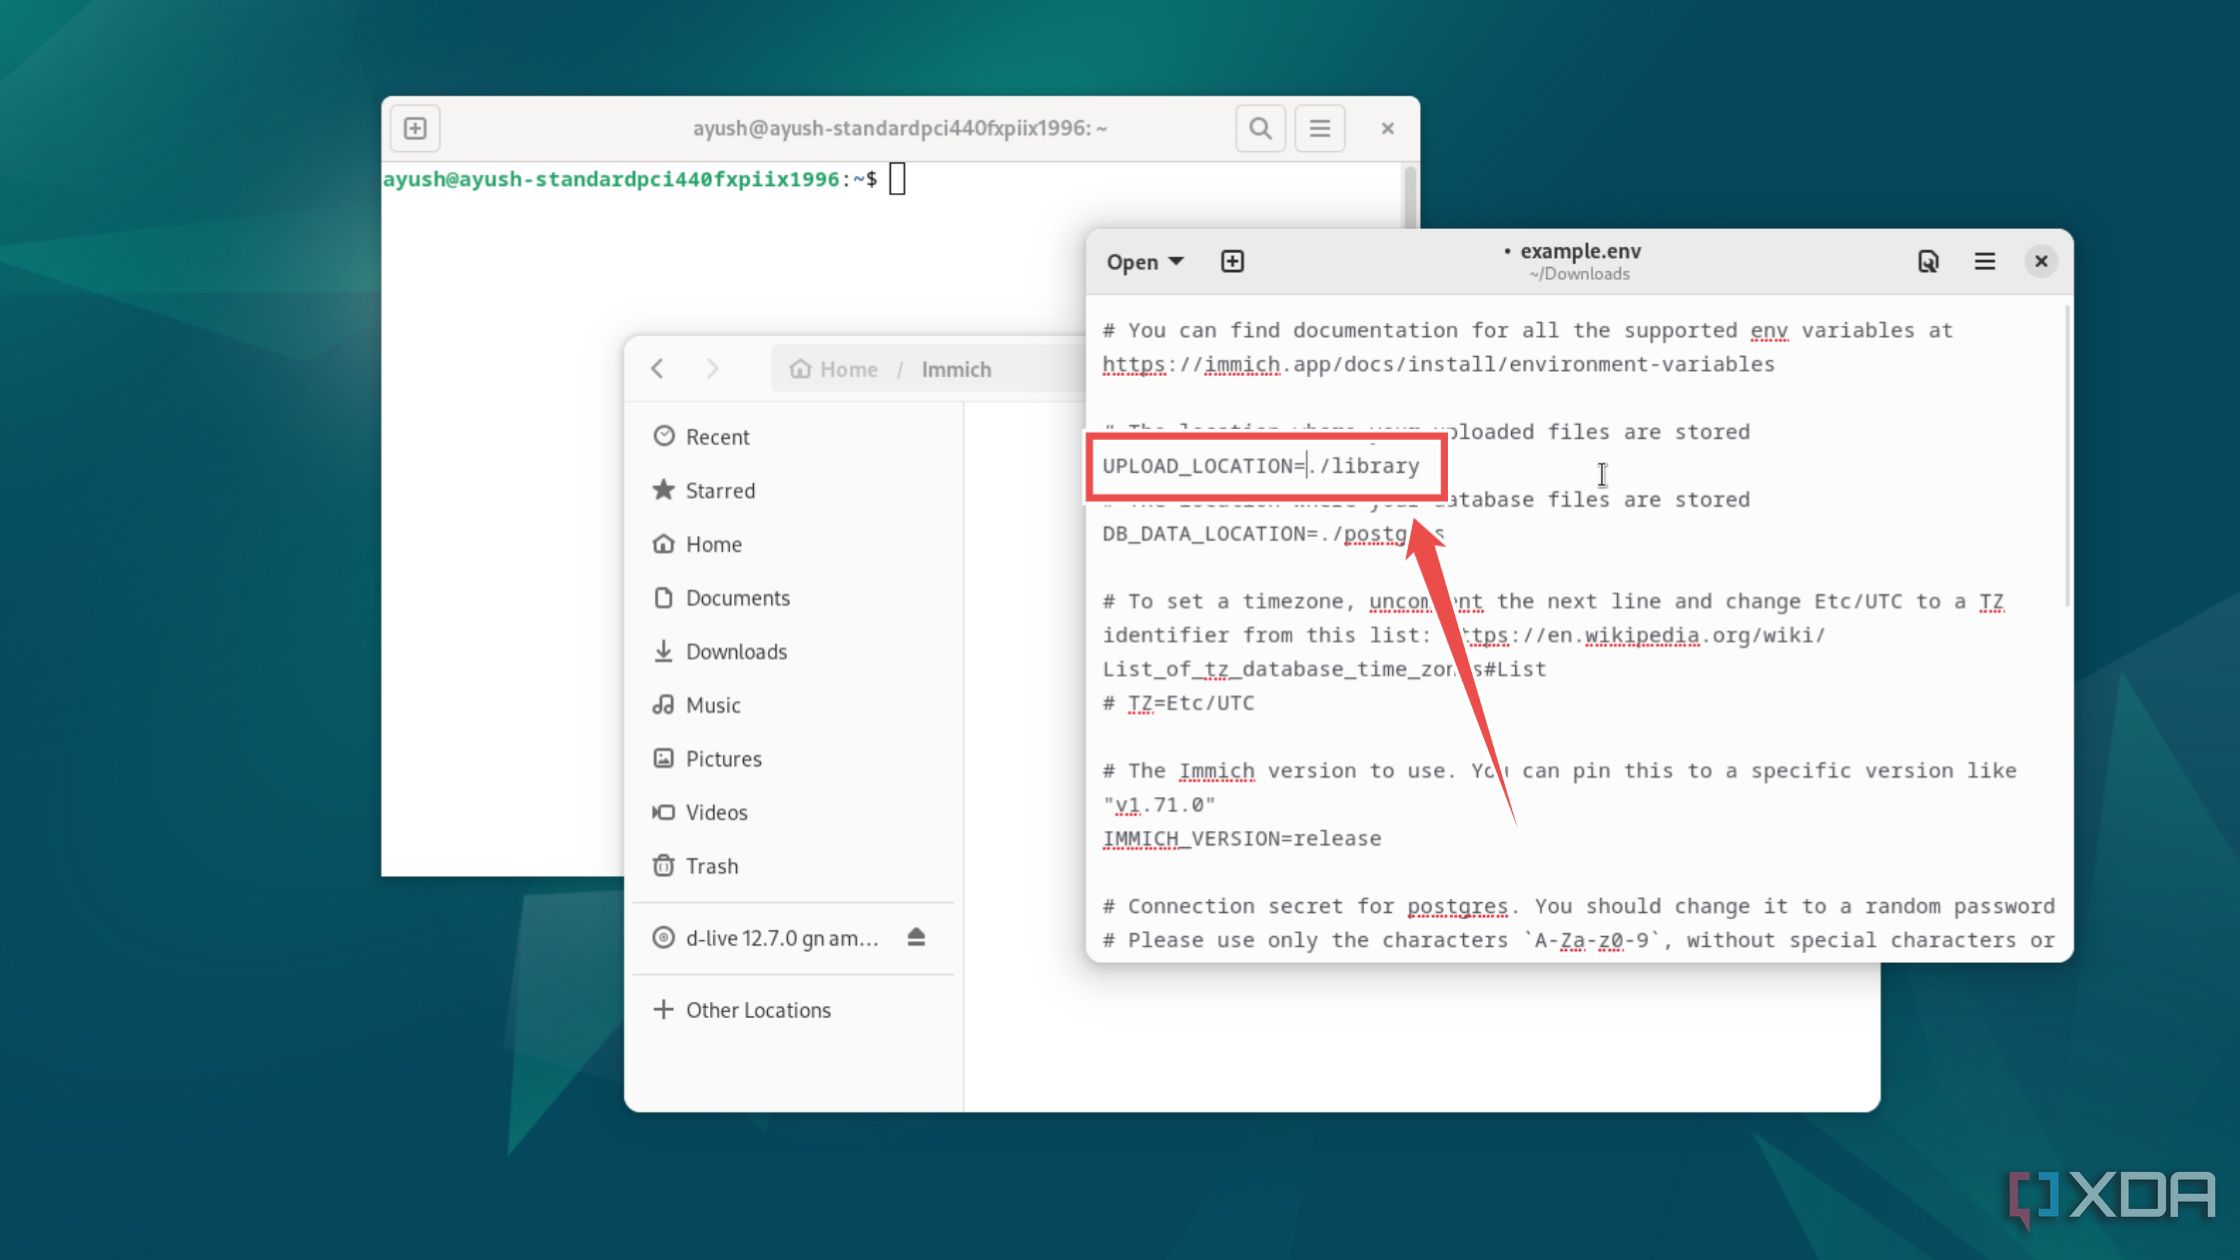
(Optional) If you wish to set a custom location for your Immich library, you can edit the UPLOAD_LOCATION string inside the example.env file.
-
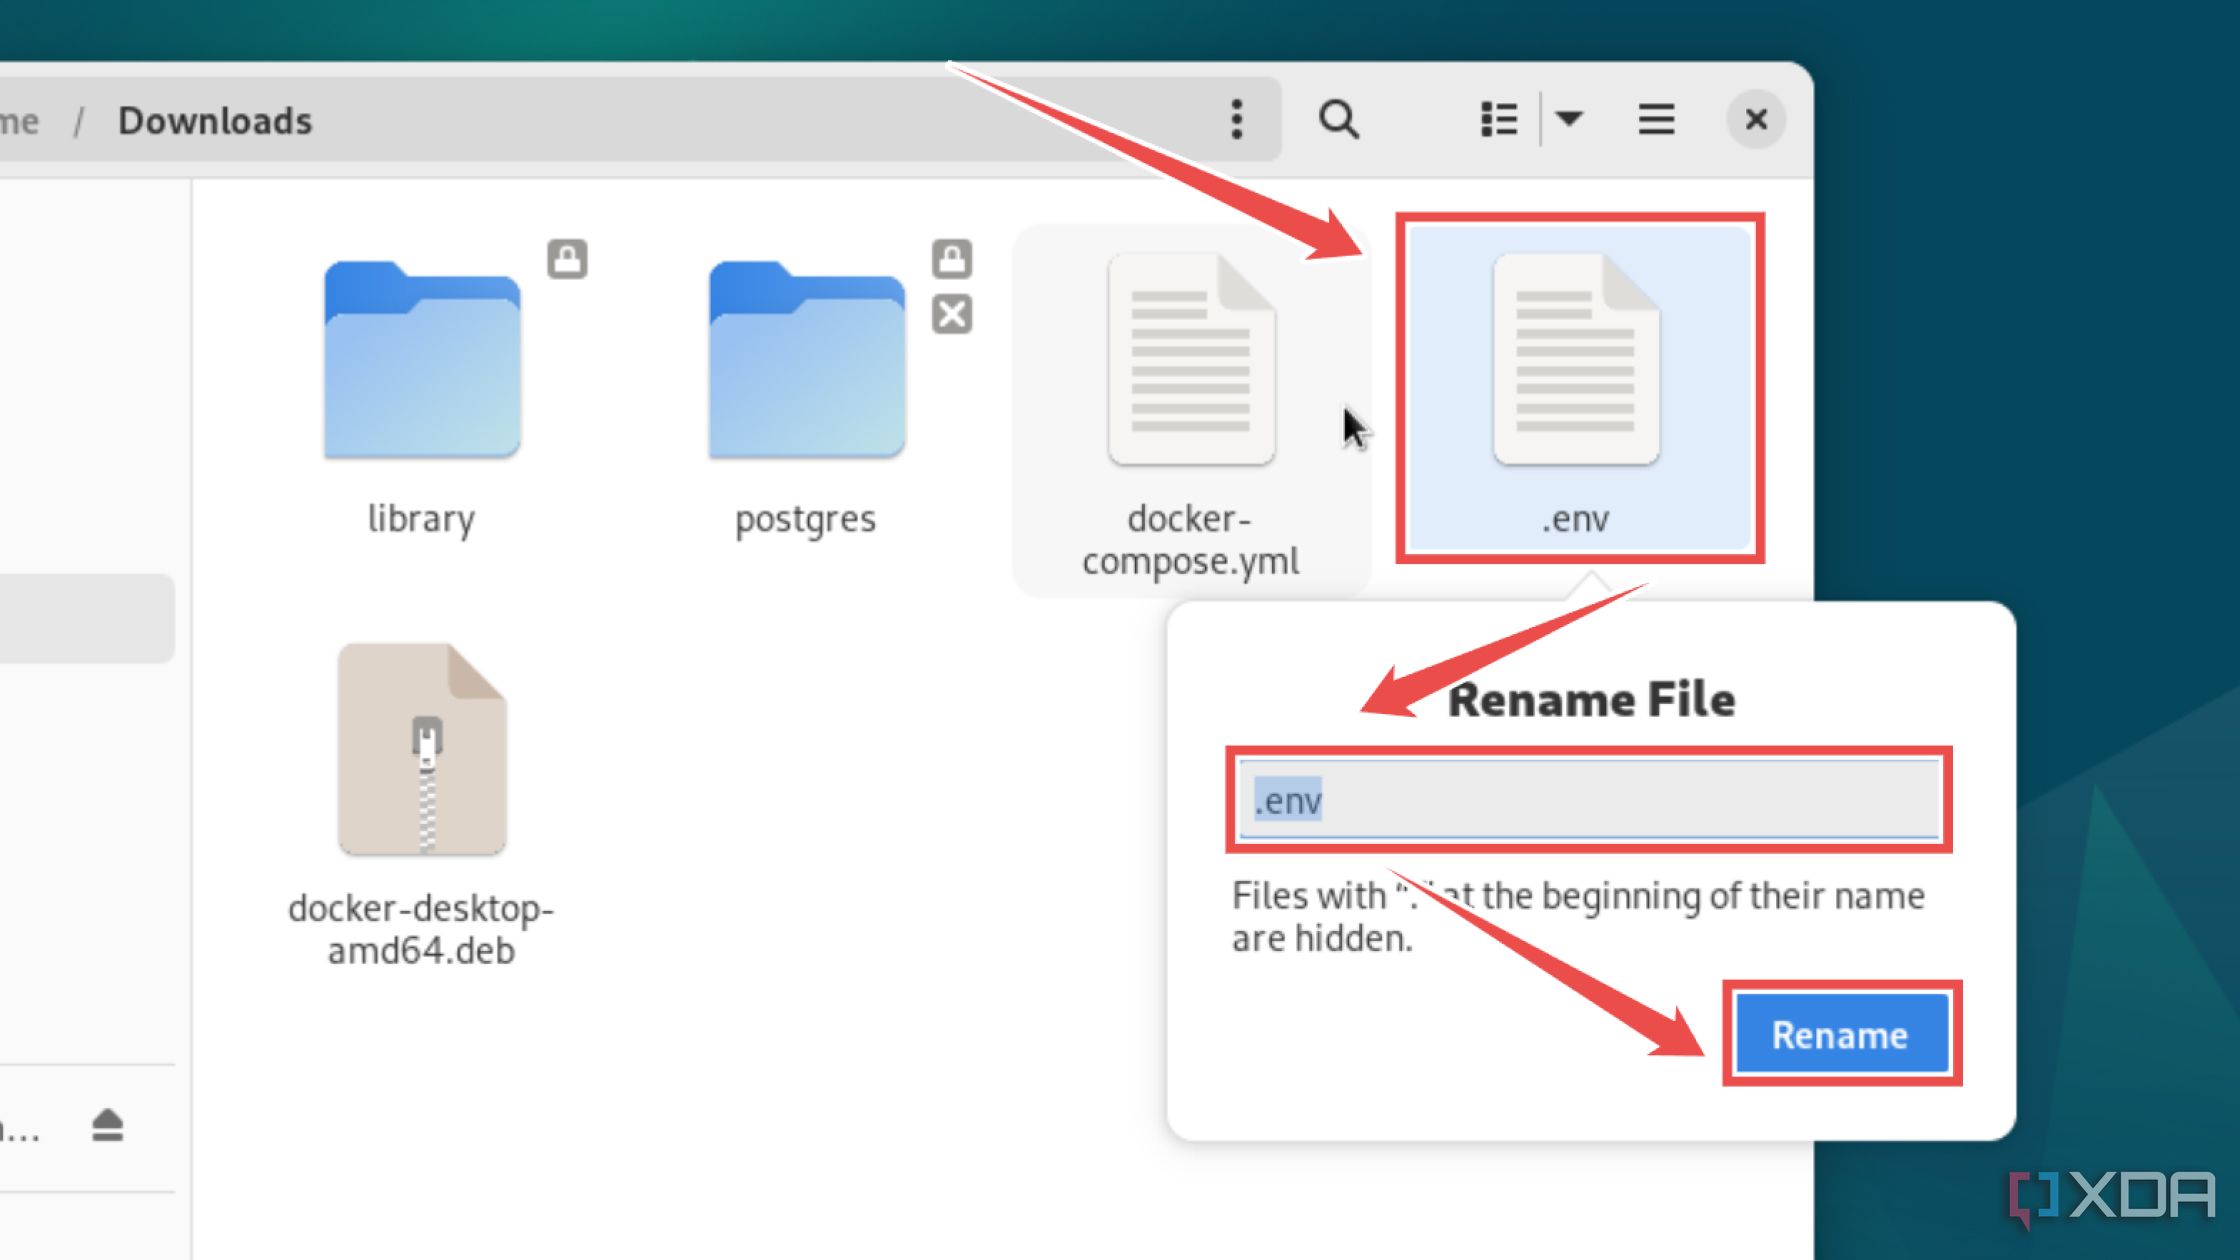
Rename example.env to .env.
-
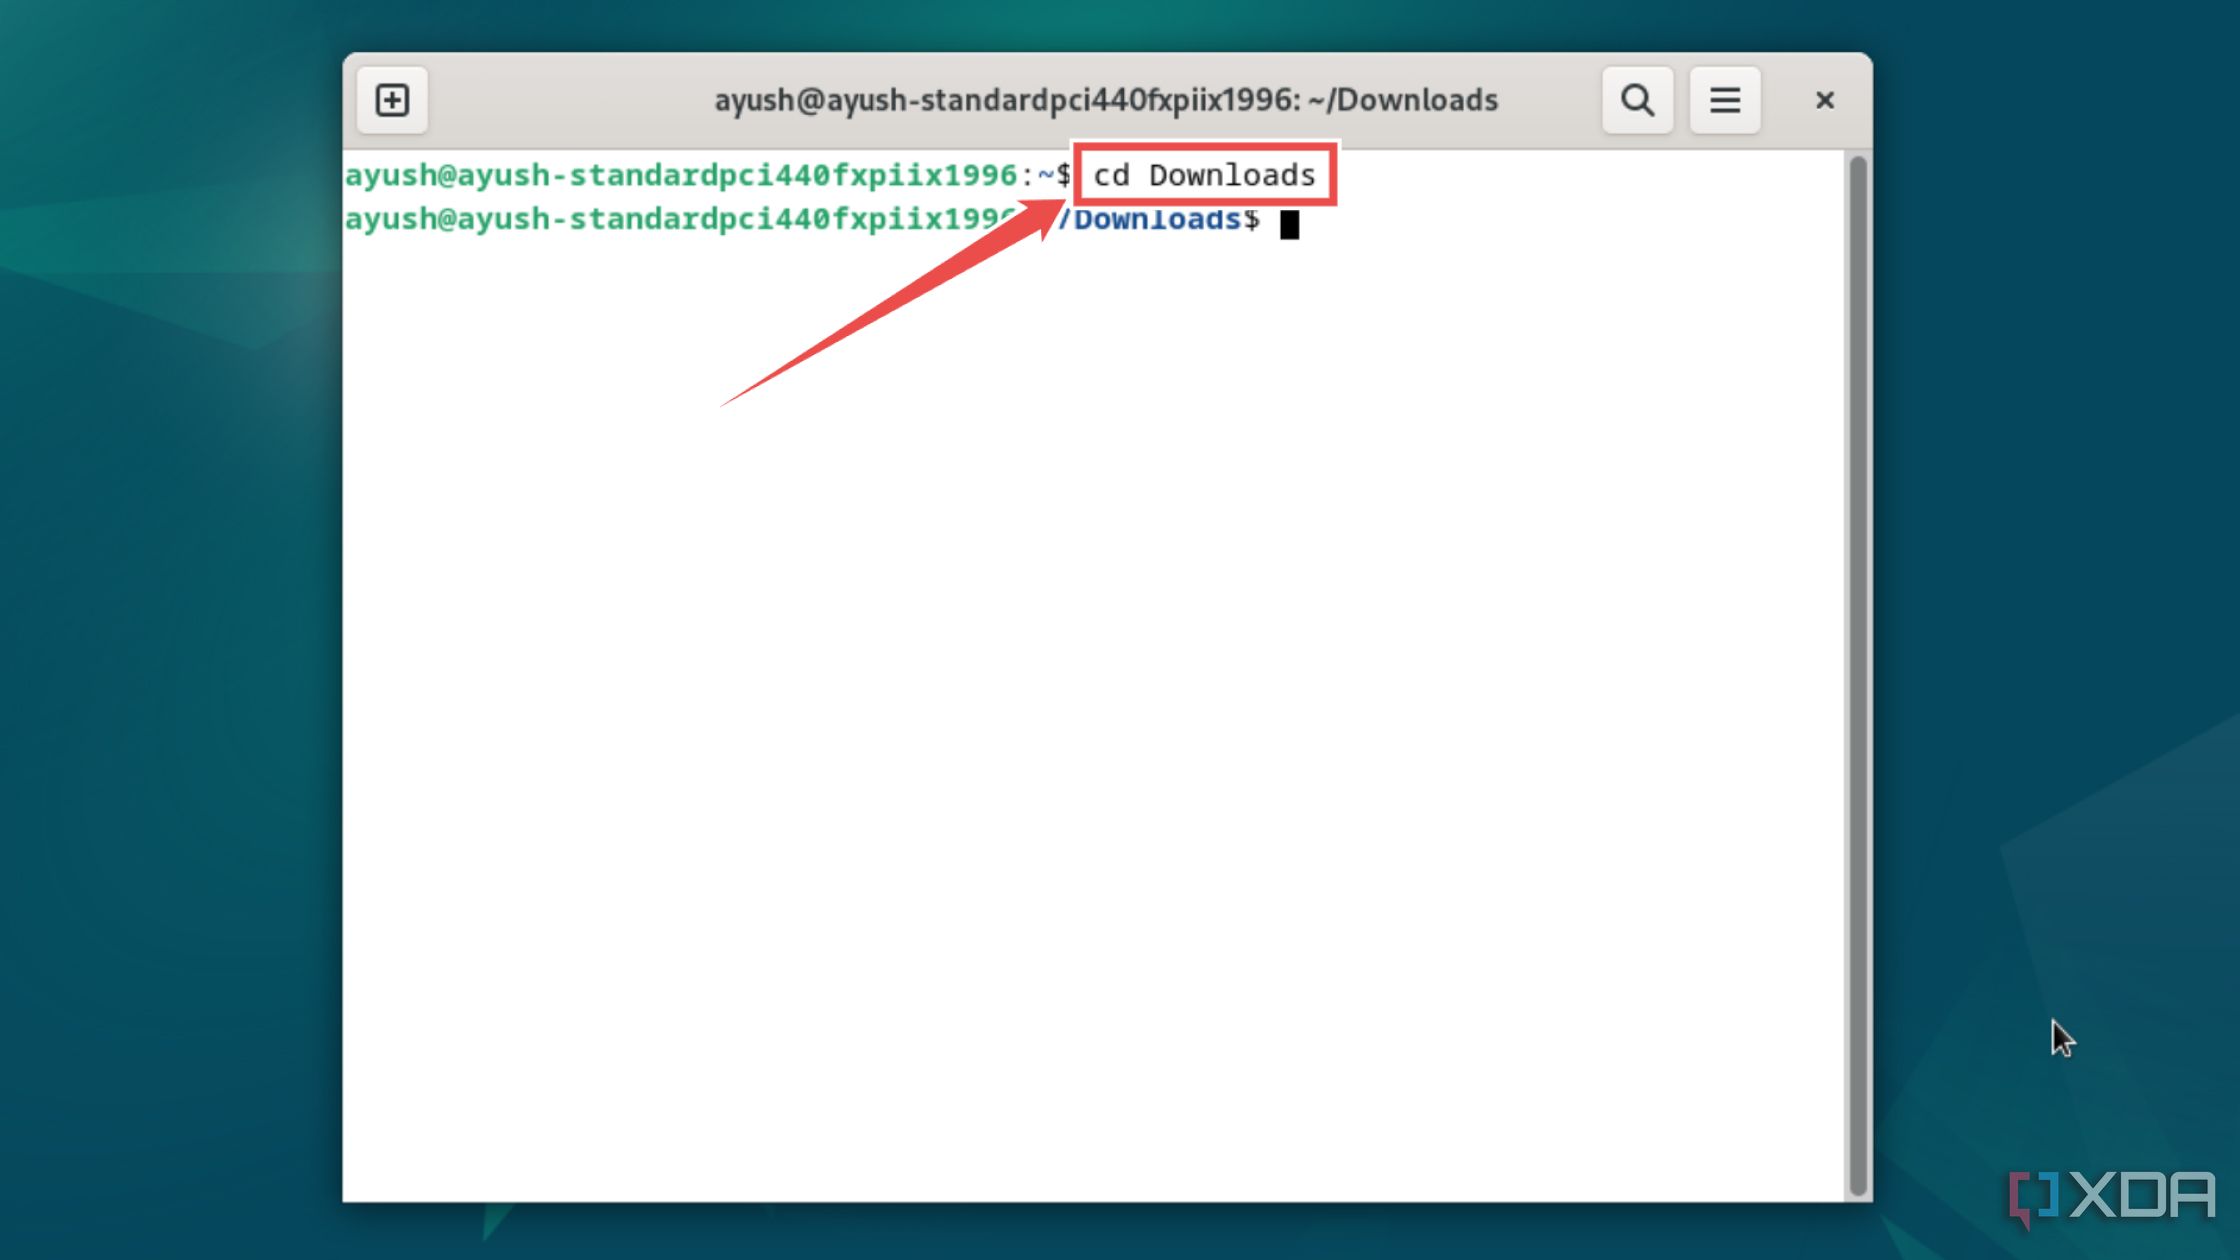
Launch the terminal app bundled with your distro and use the cd command to navigate to the directory containing docker-compose.yml and the now-renamed .env file.
-
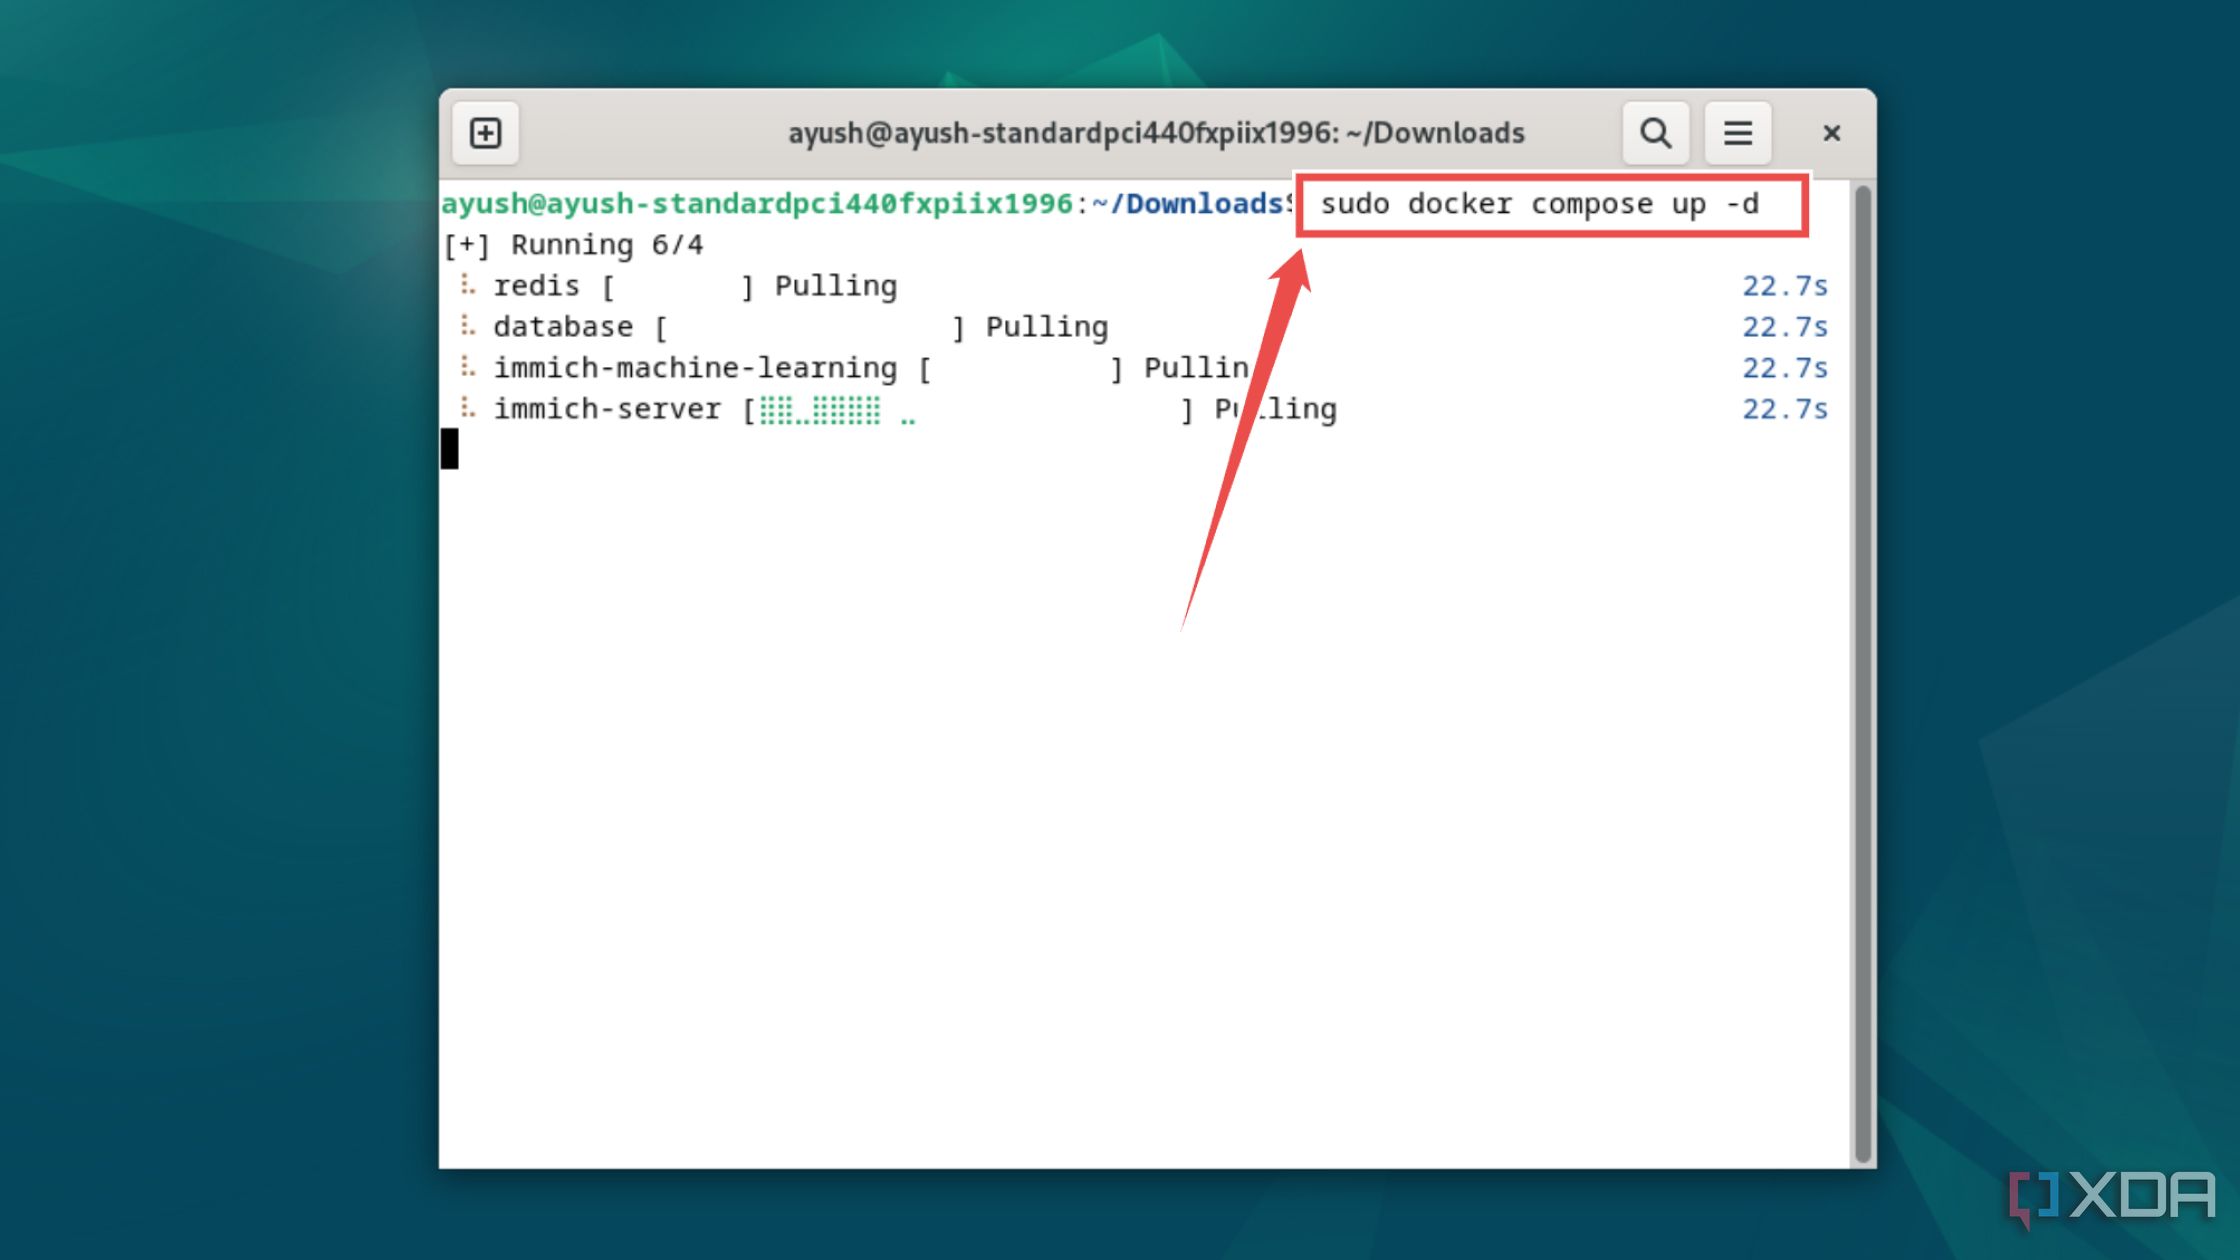
Finally, run the docker compose command to deploy the Immich container.
docker compose up -d
Once you’ve installed the container, enter localhost:2283 into the address bar of your favorite browser. This will intiialize the Immich web configurator. Follow the wizard to create a primary admin account and you’ll be good to go. Then all devices can install Immich apps or access the service through a browser. From here you can set up reverse proxies and VPNs for external access. Immich is a powerful tool and once that transformed how my household backs up their hardware to the cloud.

